I’ve been experimenting with cheap ways to improve lo-cost wood-fired earthen ovens. How can I make mud denser, harder, and more durable? Without going to bricks and/or spending a lotta dough? Adding sand to mud reduces shrink and increases density. But clay and sand are generally still less dense (hold less heat) than a good, hi-fired dense firebrick. Hmmm…
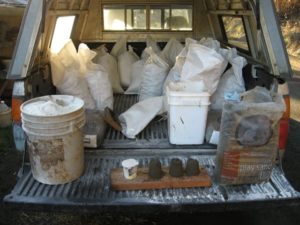
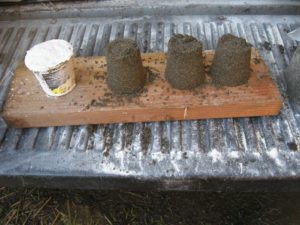
1. to increase the density and toughness of a clay/sand thermal mix appropriate for building wood-fired ovens (and other wood-fired appliances?), 2. to fabricate a higher quality cast dome (“earth-oven”) style oven. Strategies: 1. adjust the mix of particle sizes to maximize density, and 2. amend/strengthen/improve the clay binder with sodium silicate (aka waterglass, a mineral solution which fuses at typical oven temps). Here’s three cups of packed sand, and a cup of packed dust. Three plus one equals 4, right? Wrong. Add the dust to the sand, mix it well, and you get three cups of mixed stuff.
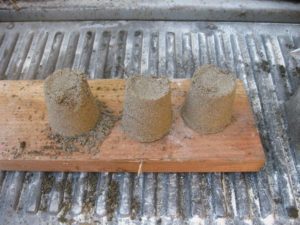
…three cups of “dusty sand”! The dust disappears into the gaps between sand particles…
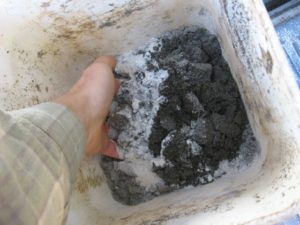
other cheap dust options might include crusher fines from a gravel pit/quarry, agricultural rock dust, mineral powders from a ceramic supplier, super-fine bagged sand, etc.
Each of these resulting three cups was about 15-19% heavier (and denser) than a cup of plain sand. (The dust is soapstone fines from an Oregon outfit that quarries and cuts its own stone; it’s extraordinarily fine, but other stone or brick dust — or super fine sand — will also work. Of course, if the particle size isn’t small enough, you’ll end up with greater volume — and more unfilled space. Engineers calculate surfaces and shapes and mix their aggregates accordingly.)
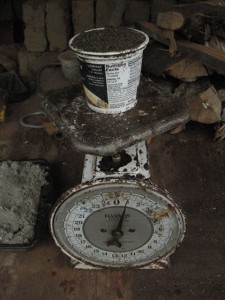
I used my wife’s baking scales to measure weight, so take my figures with a grain of salty sourdough — or three…
OK, now I take my three cups of dense mix, and add a cup of wet clay. Three plus one equals four, right? Wrong again. Because clay particles are flat as well as fine, they will fill even smaller, tighter gaps between all those fine particles. And they’ll glue everything into a solid mass — like a dense, heavy brick. (Again, things will vary according to your clay, water content, and mixing, but in general, the increase in volume will be anywhere from negligible, to much less than the single unit of added material.)
Dust, sand, and clay would make a fine mix, but the shortcoming of a mix is just that — it’s a mix; different particles and different compounds behave differently. Over the long term, repeated heating and cooling can cause particles of a mix to separate and fall out — leaving you (or your customer) with bits of grit or sand in their pizza. Not what we want!
While it may be very noticeable in a clay-sand mix, the truth is that it can happen to the best firebrick as well, because outside surfaces get much hotter much faster than interior mass. As a result, surfaces can degrade and crumble — also called “spalling.”
To treat spalling oven surfaces, I often recommend a compound called sodium silicate, or waterglass, which binds everything together, even (especially) at high temps. Mix it with water (about half and half) and either spray or brush on. It soaks in quick and deep, and serves to “fix” a substantial layer of material.
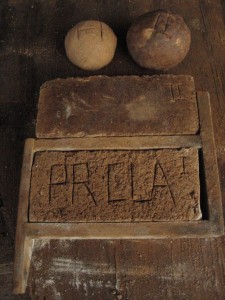
Since sodium silicate is also used in the manufacture of hi-temp mortar, I’ve often wondered whether it would be worth adding to a regular clay-sand mix. So I made a clay:waterglass mix that was approximately 4 parts wet clay to 1 part waterglass. The clay had roughly the consistency of thick peanut butter or bean paste. After mixing, I packed the clay and dusty-sand mix into a brick form (leftovers were made into a ball).
 (SIDE NOTE RE: WATER: the clay came out of the bottom of a bucket where it had been soaking for months. From previous experience, I figure it contained about a half gallon of water, so that means the liquid in the mix was roughly a 30% solution of waterglass. I was told by an industry rep that typical refractory mortar is made with a 40% solution, so I figure I’m in the ball park.)
RESULTS: both bricks appear to be roughly the same weight and density (and pretty close to firebrick densities!) But the really interesting result, so far, is shrinkage: the clay brick shrank a good quarter inch out of 7 inches total — almost 4%. In the photo, it’s the bottom brick, in the original mold it came out of. Above it is the waterglass brick, which had negligible shrink!
The surface hardness of both seemed relatively equal; both released grains of sand and grit when I abraded them (pretty hard!) with my thumb. Here, I think, compaction is very important, so all particles are in contact with each other, and you end up with a smooth, hard surface. This requires keeping the mix quite dry, and really whacking the material once the sand form is covered (I use a 2×4).
FOLLOWUP: ADDITIONAL BRICK TESTS:
Around here there are a lot of gravel roads made with local crushed rock. Most of it seems basaltic: black, dense, and heavy, usually about 3/4″ bits and smaller (called “3/4 minus”); it also has plenty of fines so it compacts into a smooth, hard surface. I’ve used it for various mixes, in particular for adding thermal mass to a big oven. After I did the tests above, I added some road base to the sand-and-soapstone-dust mix, in a 3:2 ratio. The resulting brick was even heavier than standard firebrick, and significantly harder than the mix of pure sand and soapstone dust. Given that “road rock” or crushed gravel is probably easier for most folks to come by, it might be just the thing for this purpose. Here’s some pix:
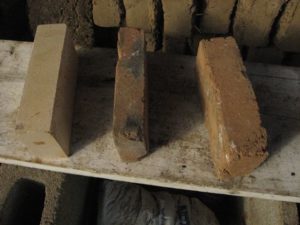
L to R: standard commercial hard firebrick, homemade brick of sand & soapstone dust, homemade brick of roadbase, sand, and dust.
L to R: standard commercial hard firebrick, homemade brick of sand & soapstone dust, homemade brick of roadbase, sand, and dust.
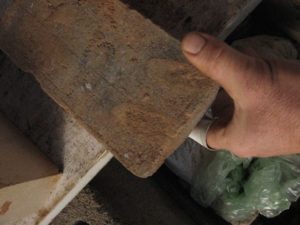
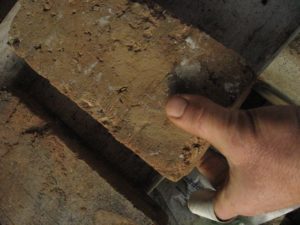
The pure sand and dust brick is a bit softer: you can see the dusty spots to the L of my thumb, where I rubbed off grains of sand.
The downside of waterglass is that it’s somewhat caustic, so glove your hands when you work with it.
Waterglass runs about $10-$15/gallon — a pretty cheap addition to an already cheap materials list.
Closing Story: A teacher presents his class with a large glass jar full of golf balls. “Is it full?” he asks. “Of course,” the students reply. He tips in a bag of marbles, shaking the jar as he pours so they fill the spaces between the golf balls. “OK, now it’s full, right?” “Right!” say the students. Then he pours in dry sand, again, shaking lightly to fill the (smaller) spaces. “Now it’s REALLY full, right?” “RIGHT!” yell the students. “The jar is your life,” he says. “The golf balls are the important stuff: family, kids, health, community. The pebbles are pretty important — earning money, keeping your boss happy, keeping your car maintained and your house painted. The sand is the little stuff: email, TV, the newspaper. If you fill up the jar with pebbles and sand, you won’t have room for golf balls, but if you start with the important stuff, there’s always room for the little things.” Then he grabbed his coffee pot, and poured in the whole thing, and a container of milk. The liquid didn’t even come up to the top… “That,” he said, “is just to demonstrate that even when think your life is really REALLY full, there’s always room for coffee with a friend….”
Hey, this is great. Thanks for writing this up! I’ve a few odd questions:
1) Setting time of waterglass-modified clay slips? Seems like some potters have difficulty with sudden sets when the mix is too rich. What effect does adding waterglass have on workability, or drying time?
2) What do you know about waterglass in an unfired cob mix? Or are the amounts required simply prohibitive?
3) I’m considering a cob structure in a cold climate and therefore looking for a (quite) thick insulative plaster with enough cohesion to slap it over rougly sculptural forms. In other words I want not to have to build an exterior form to pack it into, because at that point I might just as well build a double wall and stuff it with loose fill, flat vertical and boring. 🙂 I’m considering the use of perlite. I find lots of references to waterglass used commercially as the sole binder for perlite, usually then fired into pre-cast elements. I see less information for waterglass mixed with clay as a perlite binder and not fired, but I bet you’ve tried it! Can this mix result a freestanding consistency, or at least one that can stick to a vertical wall? If fire is not applied, what do you get? Does waterglass-slip-perlite in exterior use take up ambient humidity (of which we have plenty here) and dis-adhere from cob? Does it support adhesion of a final exterior plaster?
Thanks again for all your work
Hi! Good questions. I’ll do the best I can, but you’re trying some things I haven’t done, so I hope you’ll keep us all posted on what you learn!
First, where are you building? You say there’s plenty of humidity. Are you trying to keep heat in the building, or out of the building? How are you dealing w/solar exposure?
1) Setting time: what I’ve read/understood is that waterglass goes thru a gel phase before drying. My experience (putting a coat of 50:50 waterglass:water on a wall that wasn’t totally dry) has been that this can sometimes result in efflorescence (white, very fine crystalline deposits on the surface). As for “workability,” I’m not quite sure what you mean. In mixes w/lots of water, waterglass serves as deflocculent — which means it makes a thick solution thinner. In drier mixes, it seems to have the opposite effect, making a stiff mix stiffer. I haven’t noticed effects on drying time — but there are so many factors: humidity, air movement, etc.
2) waterglass in an unfired cob mix: I would begin by asking “why add the cost?” and “why make your mix harder to handle (causticity, stiffness or increased water requirements)?” “Why compromise vapor transfer?” Cob alone is pretty perfect: strong, breathable, thermally stable, weather-resistant, etc.
3) insulation: for anything thicker than a couple of inches, I’d definitely want to provide support at the bottom of the wall, as well as ties into the main cob. Here’s a thought: hammer vertical lines of pegs (leave as much showing as the thickness of your desired final insulation layer). Space the lines out every 24″ to 36″. Apply insulation in layers about an inch thick. Use up some baling twine to cross the open space between lines of pegs, and help tie the insulation to the wall. The more courses of twine, the better the bond (but maybe one course of twine just at the top of the insulation layer might be enough?) I haven’t used waterglass to bind aggregate. Seems like it would work, but I’m always inclined to use cheaper, more local materials whenever I can, so I’d go for sawdust and/or chopped straw. Maybe toss it lightly in a 50:50 water:waterglass solution (to minimize absorption of water, which is, I believe, how they treat masonry grade perlite used for insulative fill in block walls — which also makes me think that waterglass is hydrophobic — but that’s just a guess). Then I’d let it dry completely, and use clay for binding the insulative mix (maybe add a bit of waterglass?)
Hi Kiko,
Thanks for your report on your experiments with your fire bricks and you related class room story. So true. Sorry if I missed it, but were the test bricks in the photos fired or flamed to start the hardening process? If fired, do you have a wood fired method for this? Like to hear how the bricks perform.
I make sodium silicate to protect stainless steel or titanium foil from heat/oxidation in micro wood burning stoves that I make. They are so light that they weigh as little as 500g. The coating is made of sodium silicate (goopy thick consistency) and talc powder and metal oxides for a dark colour. The colour helps to show the coating thickness. In regard to your use of silicate to stop getting spalling in your pizza, have you thought of putting talc and iron oxide in the silicate so that you can see the new surface clearly and if it is staying intact? With high heat in my stoves that glow red on the outside est 500-550 degree C, it goes from a blackish grey to a warm reddish colour and is very hard and shiny.
Lastly, it sounds as though you have got a very cheap supply of silicate. Is it full strength (thick)? I paid a lot more than that for my first little tube of stove cement that just had some sodium silicate in it. Consequently. I found out how to make it from the cheapest of household chemicals.
Keep up the good work.
Tim
Hi, Tim,
thanks for the fascinating story — I haven’t added any aggregates when I use the stuff to bond an oven — I’d be fearful that it would inhibit/slow absorption, which is the most critical piece of addressing spalling issues — but it would be easy enough to do a second, surface layer, which might be interesting. As for the bricks, it’s been so long now that I don’t recall whether I fired them — I don’t think so. I did build an oven using home-made bricks which I had dipped in water glass, and I did observe with those that after awhile, they seemed to exude a fuzzy layer of what I assumed to be efflorescence. I wasn’t able to investigate fully. More testing/experimentation is certainly warranted. My supplier for the water glass is Georgie’s Ceramic Supply in Oregon, and yes, it’s pretty cheap by the gallon. But how did you make it? I was under the impression it took industrial scale combinations of heat and pressure. Please do share! And thanks again for writing.
It is very easy to make water glass. I have made it many times. There are a lot of youtube video like this one
https://www.youtube.com/watch?v=-Mx1-o1_MWo
Hi
Do you guys do cutting away of materials like bricks and ect?
Thanks for this write up, this is great stuff! I’m excited to start playing around with amendments now that I have gotten a pretty strong feel for the combinations of sand, straw and clay variants. I’ve been doing some very preliminary research on geopolymers, but as I am far from being proficient in the field of chemistry, I am at a loss while observing most of the formulas and chemical reactions. Have you experimented with wood ash in any of your mixes? I am wondering about ratios, and types of wood (i.e. oak having higher calcium content than doug fir) for mixing refractory strength mixes as well. Also, do you know what temperature is typical for kiln firing fire brick after it has dried and would it be possible to build an earthen kiln with a rocketstove bell? I would love to be able to create my own fire brick mix and I’m excited to try water glass amendments after reading this thread. Thanks again for all that you do!
Hey, Jim, apologies for late reply; for some reason, I don’t seem to be getting notifications when people comment! We need a chemist/materials scientist to really answer some of these questions. That said, I’ve used wood ash in the mix to good effect — so has Donkey (Kirk) Mobert. You might ask at his rocket stove board, if you haven’t already. http://donkey32.proboards.com. How’s that Peterberg stove going?
Kiko
Hey Kiko,
Thanks for the post, very interesting to follow your evolution! I have some questions if you don’t mind, maybe others would be interested reading your answers too.. ;-)What do salt and sugar do to the clay mix and the role of horse manure? I’ve stumbled upon these two elsewhere. To avoid cracks in the oven, what do you think of adding some kind of fine fibre (hair, wool, fur etc.) but at the same time increasing the thickness of the thermal mass? Have you tried doing different layers in the oven, say the inner of grog mix e.g. 2 inches, then sand-clay, so that to avoid vitrification of the mass that is closest to the fire? Do you think it’s doable to layer materials of different densities in the oven? It’s just expensive to do all the thermal mass only in clay-grog mixture … Have you tried glazing the interior to prevent vitrification? In tandoor oven tradition they cook some kind of thick porridge with spinach and lots of oil and then brush the interior with it to achieve a non-stick surface for their flat breads. This prevents from grit falling and i guess protects the oven too!? In the central Asia they just apply cotton oil that burns into the surface…I have read elsewhere that it’s important to soak clay for a few days before making an oven- why is it important?
Best regards,
Alexander
OK, Alexander,
thanks for writing. I’ve re-organized your questions a bit to try and make my reply as useful as possible. Here goes:
Q: Why do people talk about using salt and sugar in clay mixes?
A: Years ago, Bill Steen (canelo project) and Paco Gomez (sanisidro.org) separately mentioned that traditional Mexican ovens incorporated a layer of salt below the hearth as a heat sink. I tried it once, but never heard anything from the users to confirm (or, really, deny) whether the layer made much difference to oven performance. I haven’t made further investigations into salt as an additive. Nor have I calculated the specific heat of salt to compare it to a sand/clay mix, but I did find that some salt migrated to the surface of the clay mix where it absorbed water and significantly softened the exterior plaster (Salt is hydrophilic — it absorbs water. Heat and water together will thus push the salt out to the cooler parts of the oven. This makes me wary of adding salt to a mix.)
SUGAR: A Canadian/German mason friend who had apprenticed in Germany told me that his traditional German mason-mentor added sugar to his brick mix (less than 1/10th of a percent by volume). I presume that this feeds the ferment and improves the workability of the mix. Does it also serve as additional binder? I don’t know. I doubt that such a small amount of sugar remains long in the mud, as it would be quickly consumed by native yeasts and bacteria. Like so many traditional practices, it’s not (to my knowledge) been scientifically evaluated. I do think that fermentation by-products make a mix more workable and lively (see next question).
Q: I have read elsewhere that it’s important to soak clay for a few days before making an oven- why is it important?
A: Traditional potters soak and age their clays because it gives bacteria and other organisms time to work, with the practical effect of making the clay more plastic and workable. I don’t know what the exact chemistry of the process is — on the street it’s just called “PFM” (“pure effin’ magic”).
Q: What about fibers in the mix? (especially horse manure) How does the presence of fiber effect the heat performance of the mix?
A: Horse manure is typically very fibrous (partially digested hay) and typically used in mud mixes to limit cracking and add toughness. In a refractory oven mix, which gets very heat, voids in the mass from burnt-out organic matter can help moderate the effects of thermal shock by opening pathways that persuade major cracks to split up into many micro-cracks, and also, possibly, by absorbing some of the expansive force of heat.
By the same token, however, increasing the fiber content of a mix, whether it’s manure, hair, wool, fur etc., decreases the density of the mix (how much depends on the amount of fiber, and any resulting changes in the volume of the total mix — the ratio of weight to volume being what determines density — a less dense material transfers heat more slowly — i.e., it insulates). If necessary, you can partially compensate for that by increasing the thickness of the thermal mass. Again, however, this is an area that would require controlled experimentation in order to provide authoritative answers.
Q: What about layering ovens?
A: I have tried layering oven mass when it made sense (I was using expensive grog aggregate which I had made into bricks — these I covered w/a layer of regular mud made with (free!) dense basalt road base aggregate — see the Blue Goat Oven post). Otherwise, however, I don’t think it offers much benefit over a decent, dense thermal mix.
VITRIFICATION: Technically and literally, this term refers to the process of heating crystalline silica to the point where it melts into an aqueous form (the clear, moldable stuff we commonly make into windows and bottles). True vitrification requires blast furnace temperatures that aren’t typically achievable in a mud oven. At lower temperatures, however, another transformation does convert “raw” clay into a cooked (“fritted”) form that is no longer clay — that is, adding water won’t turn it back into malleable mud. You can see this in the hottest inch or so of the dense layer, which typically turns to a pinkish hue after the first few firings. The more the oven is fired, the more mud gets converted.
Q: Do you think it’s doable to layer materials of different densities in the oven? It’s just expensive to do all the thermal mass only in clay-grog mixture …
A: The kinds of differences in density you can get by using different aggregates is, I think, really not that significant for most home ovens. I do think it’s probably worth doing for a commercial mud oven.
Q: Have you tried glazing the interior to prevent vitrification?
A: See the note above about vitrification. If anything, you might try to encourage vitrification on the surface of an oven to make it stronger, but again, it requires higher temperatures than you get in normal firing. It may be possible to achieve vitrification at lower temps by using a flux (borax is one I’ve heard mentioned), but I haven’t tried it. The best practice I’ve come up with for hardening the interior surface of an oven (especially one that’s soft or crumbly) is waterglass (see related post here).
Q: In tandoor oven tradition they cook some kind of thick porridge with spinach and lots of oil and then brush the interior with it to achieve a non-stick surface for their flat breads. This prevents from grit falling and I guess protects the oven too!? In the central Asia they just apply cotton oil that burns into the surface…
A: I have heard a lot about this, but haven’t tried it myself (we don’t do tandoor-style cooking!), or investigated very deeply. I suspect it’s a bit like “seasoning” a cast iron pan. Heat makes things happen (see “PFM” above). The byproducts of those events change the composition of mud, and leave various residues on the surface. Traditional practice is all empirical study. Putting it into modern, western scientific language requires controlled testing. But if you try it and it works, that’s good!
Kiko- We’re just starting our oven next week. A couple of questions about waterglass. I assume if you’re putting it into your sand-clay mix you don’t want to be mixing it barefoot. Does it make sense to add after most of the mixing is done? Also I’m using purchased firebrick for the hearth. Would this best be treated with waterglass before putting the sand form on or after the oven is done and the sand removed? Thanks. Your book has been most helpful.
When I made those test bricks, the waterglass was part of the liquid for the mix. Since it’s a deflocculant, I don’t think I’d add it separately. And yes, I don’t like getting it on my skin, tho I suspect portland cement would be worse — and that’s not too bad. I don’t think it’s necessary to treat the firebrick w/waterglass. Keep me posted on your results! I’m teaching an oven workshop down here in Corvallis August 16/17. If you know anyone who might be interested, tell them to look up “cob oven workshop” on Corvallis Craigslist…
Hi Kiko,
I took Bernhard’s class at Ananda last summer and picked up your oven book from him.I am finally getting around to building an oven and need to ask a question.I just put in my base insulation and to get it nice and level I have the highest bottle showing and the lowest bottle with less than an inch of well packed insulation covering it.Is this going to cause a settling problem?If so should I scrape some insulation off?By the way I am using perlite/slip.
Thanks and take care, Joe.
whoops, I missed this in February. Presumably, by now you’ve solved the problem and your oven is finished! But for others w/the same question, and assuming no more than about an inch of difference in bottle height, I would bring the (tamped) perlite up to the top of the lowest bottle, and then cover them all w/the next layer (dense mud), to insure good connection and bearing surfaces, so the hearth floor is well supported. More than an inch or so difference in height, I’d look for some other bottles…
I love a good story.
Thanks for doing this work.
Richard
Hey, Richard, thanks for the note. Good to be able to scan your site and see what you’re up to. Impressive. Congratulations! If I was closer, I’d join you for the mowing party. We need to set you up w/a Rocket mass heater…
Thanks for this article on making a better brick. And, more importantly, thanks for the closing story. It is too easy to forget that there is always time to share coffee with a friend. I passed this on to our teacher friend and plan to use this example myself. Good Day